There’s nothing quite like rolling out at sunrise, bike loaded, trail ahead, and that buzz of anticipation in your chest. But before you get to that moment—before the wind-in-your-face freedom—you’ve got to figure out how the heck you’re going to carry your stuff.
That’s where bikepacking bags come in. And yeah, they matter… a lot. If you’ve ever ended up with a swaying saddlebag or had your knee knocking into a frame pack for 50 miles, you know what I’m talking about.
Let’s talk about how to get it right, with tips I gathered from years of experience—trail dust, rainstorms, awkward climbs, and all.
Bikepacking Bags Are a Big Deal
A bag setup that attaches directly to a bike offers a sleek and stable way to carry camping gear, clothes, food, and other essentials out on the road (or trail).
Traditional panniers can certainly hold a ton, but they’re not always ideal on gnarly singletrack or narrower paths. Bikepacking bags keep weight centered and streamlined, so your ride feels more nimble.
Plus, lightweight bags are easier to manage on rough or technical terrain. A balanced load can help with traction, cornering, and just about every other part of the ride.
Nobody wants to wrestle with an off-kilter bike on loose gravel or rooty trails, so balancing the load is a pretty big deal.
Common Types of Bikepacking Bags
View this post on Instagram
A typical bikepacking setup includes a handful of different bags. Each one latches onto a specific part of your bike, and each is intended for certain items.
Below are the main categories, along with reasons folks love ’em:
Seat Packs
- Typical capacity: 5 to 15 liters (some go a bit bigger)
- Great for: Bulky, lightweight gear that doesn’t need to be accessed constantly—like a cycling cap, sleeping bag or spare clothes.
- Keep in mind: Large seat packs can sway if they aren’t strapped tightly. Look for those with internal supports or stiffeners to avoid a wobbly feeling when out of the saddle.
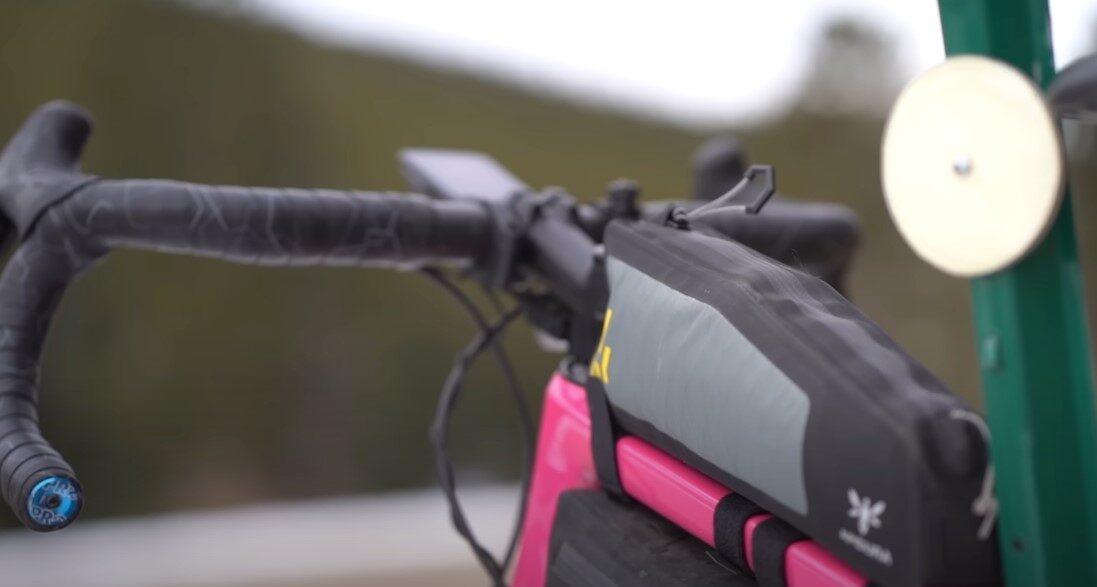
Handlebar Bags
- Typical capacity: 3 to 20 liters
- Ideal for: Items that are light but might take up space (think tents, sleeping mats, or jackets).
- What to watch out for: Bar type matters. Drop bars sometimes limit the width of handlebar bags. Double-check clearance for your hands, brake levers, and cables.
Frame Packs
- Typical capacity: 3 to 10 liters
- Best for: Denser, heavier gear—like tools, food, stove, or water—thanks to the low center of gravity.
- Extra considerations: Make sure the pack fits your frame shape. Cables, bottle cages, and even frame size can affect which pack works best.
Accessory Bags (Stem Bags, Top Tube Bags, Etc.)
- Typical capacity: Usually under 2 liters
- Purpose: Small items you want to grab fast: snacks, phone, battery bank, mini-pump.
- Pro tip: Top tube bags or stem bags may seem minor, but having easy access to food can keep you pedaling without skipping a beat.
Factors to Weigh When Selecting Bags

Grabbing any random pack might be tempting, but it’s smart to look at a few key factors before swiping that credit card:
1. Duration of the Trip
Longer journeys call for more gear. Overnight outings might need a seat pack plus a handlebar bag. Those heading off for a week or more might add a frame pack too.
2. Terrain and Conditions
Bumpy or rocky trails can give gear a beating, so consider tough materials and water resistance. Scraped-up packs are no fun, and soaked clothes even less so.
3. Bike Compatibility
Not every bike can handle the same bag shapes or capacities. Double-check that the seat pack won’t rub the rear tire or that your drop bars can handle a wider bar roll.
4. Weight Distribution
Heavier stuff goes lower in the triangle or close to the seat post in a seat pack. Keeping weight centered helps avoid that top-heavy wobble. Light, bulky things can sit up front without messing up steering too much.
Step-by-Step Guide to Scoring Your Ideal Setup

Grasping a few practical steps can prevent last-minute scrambles:
1. List Out All Your Gear
Think about the items that absolutely need to come along. A sleeping bag, tent, cooking gear, clothes, snacks, and so on. This helps narrow down total liters needed.
For multi-day epics, a total of around 40 liters (spread across seat, handlebar, and frame packs) usually works for an ultralight style.
2. Match Gear to Bag
- A big seat pack (5 to 15 liters) typically swallows a sleeping bag, puffy jacket, or even an air mattress.
- A handlebar roll might snugly fit a tent, especially if it can be rolled tight.
- The frame pack stays reserved for heavier stuff (tools, stove, water).
- Stem or top tube bags are perfect for stashing quick-grab energy gels and bars.
3. Check Durability and Waterproofing
Rain can show up out of nowhere, so it’s best to look for seam-sealed designs or at least water-resistant fabrics. Some brands include roll-top closures that block out moisture.
Abrasion-proof panels in high-wear areas can save the day, especially if your trails are chock-full of muddy puddles or debris.
4. Assess Your Bike’s Geometry

Smaller frames can limit seat pack size, especially if you have a dropper post or minimal clearance. Flat bars generally give more space for a handlebar roll.
Also, watch out for cables. Some bikes use external cable routing that can interfere with bigger frame packs.
5. Organize and Distribute Weight
Try to keep your center of gravity nice and low. Heavier items go in the frame pack or near the seat post. Up front, stashing only lightweight stuff can reduce that “oversteering” feeling.
If your bars feel wobbly, remove a few things and move them elsewhere.
6. Do a Test Run
Before the big adventure, toss your gear into the bags and spin around the block—or even better, find a local trail. Check for swaying or rubbing. Make adjustments, add spacers, or shift gear from one bag to another if needed.
A Few Expert Tips and Personal Insights
- Don’t skip top tube bags. Many folks forget how handy it is to have a small pouch up near the handlebars. Grab a snack without stopping, or stash a phone or wallet for easy scanning of maps.
- Strap everything securely. A seat pack can bob around if the straps aren’t snug, and that can drive you nuts on long climbs. Some riders also wrap protective tape around their seat post or frame tubes to prevent scuffs.
- Test different combos. One brand’s seat pack might pair well with a handlebar bag from another. It’s fine to mix and match, as long as the overall setup feels balanced.
- Don’t overstuff. Resist the urge to jam everything in “just in case.” An overfilled handlebar bag can cramp your hands or cables. Plus, extra weight can drain energy faster on brutal climbs. Less can really be more.
Common Trade-Offs

Capacity vs. Accessibility
Bikepacking bags often look sleek and minimal. That means you can’t just rip them open like a big suitcase. Seat packs, in particular, involve rummaging from the back or unrolling a closure.
On the flip side, smaller, easily accessible bags keep your phone or lunch within reach. Plan out what items you’ll need quickly and store them in a place you can grab on the fly.
Weight vs. Toughness
There are super-light fabrics that help you zip along faster, but they might not hold up so well after a series of rock scrapes or branch snags.
More robust materials can handle a beating, though the bike will feel heavier. Figure out the conditions you’ll face.
Rugged rocky trails? Might be better to choose a heavier but sturdier fabric.
Cost vs. Extra Features
Budget-friendly bags can absolutely do the job. Some riders use them with zero complaints. Pricier options often have higher-end materials, fully waterproof designs, or slick extra compartments.
If you’re planning all-year bikepacking with consistent rough terrain and nasty weather, investing in a premium brand may be worthwhile.
Wrapping It Up
So there you have it. Your choice of bikepacking bags has a big effect on comfort, balance, and overall fun. Pin down the right combo of seat, handlebar, frame, and accessory bags for your bike’s geometry, the terrain you’ll tackle, and the gear you must bring along.
Go for a test ride, tweak straps, shift items, and see how it feels. Pick the right bags, and life on two wheels gets a whole lot simpler. Now get out there and roam—there’s a whole world waiting beyond the pavement.