Every cyclist knows the sound. You squeeze the brake lever, expecting a clean, silent stop, and instead your bike sings out with a shrill squeal or grinding howl.
It can make you self-conscious in traffic, annoy your riding buddies, and even shake your confidence in your bike’s stopping power.
The truth is that brake noise is not just about embarrassment – it’s usually a signal that something in the system needs attention.
The encouraging part? Most squeaks come from predictable causes. With the right checks and a few careful adjustments, you can often silence noisy brakes at home without a shop visit.
Below you’ll find a detailed, step-by-step troubleshooting guide for both disc and rim brakes, built around what experienced mechanics and major manufacturers recommend.
Key Points
- Brake squeal usually comes from vibration caused by contamination, misalignment, or uneven pad/rotor contact.
- Cleaning, alignment, correct torque, and bedding-in pads solve most noise problems for both disc and rim brakes.
- Rim brakes often quiet down with proper toe-in setup and clean pads/rims.
- Replace parts if pads or rotors fall below safe thickness limits, or visit a shop if noise persists.
Safety Comes First
Before chasing quiet, make sure your brakes are safe. If you notice weak stopping power, pulsing, or an inconsistent bite, tackle that first.
Brakes should stop you confidently in all conditions. Noise is secondary to performance.
Why Brakes Squeal
Brake noise is vibration. In technical terms, it’s often “stick-slip” resonance, which happens when friction alternates between grabbing and slipping in tiny cycles.
That vibration then transfers into the caliper, rotor, rim, or even the fork, creating a sound that ranges from a squeak to a howl. The root causes vary slightly between disc and rim brakes:
- Disc brakes: contamination, uneven pad material transfer on the rotor, misalignment, or a bent rotor.
- Rim brakes: dirty pads or rims, pads set parallel instead of at a toe-in angle, or fork resonance amplified by the brake arms.
Quick Pre-Check
Before grabbing tools, pay attention to when the noise shows up:
- Only when braking lightly: often uneven pad transfer or misalignment. Bed-in and alignment help.
- After wet rides: some setups will squeal until the rotor heats up and dries. A few firm stops usually clear it.
- Pulsing once per wheel turn: often a bent rotor or a rim seam causing uneven friction.
This quick “ear test” helps narrow where to look first.
Tools and Supplies You’ll Need
A small investment in proper tools makes the process easier and safer:
- Lint-free rags and isopropyl alcohol for cleaning.
- A set of hex and Torx keys, plus a torque wrench for tightening bolts to spec.
- A rotor truing fork for disc brake rotors.
- Fine sandpaper for scuffing glazed pads (rim brakes).
- A thin card or spacer for setting toe-in on rim brake pads.
Fixing Disc Brake Noise

Disc brakes are powerful and consistent, but they’re also sensitive to contamination and alignment. Here’s the step-by-step process most mechanics follow.
1. Clean Thoroughly
- Wipe down rotors with isopropyl alcohol and a fresh rag.
- Clean caliper bodies and exposed piston faces.
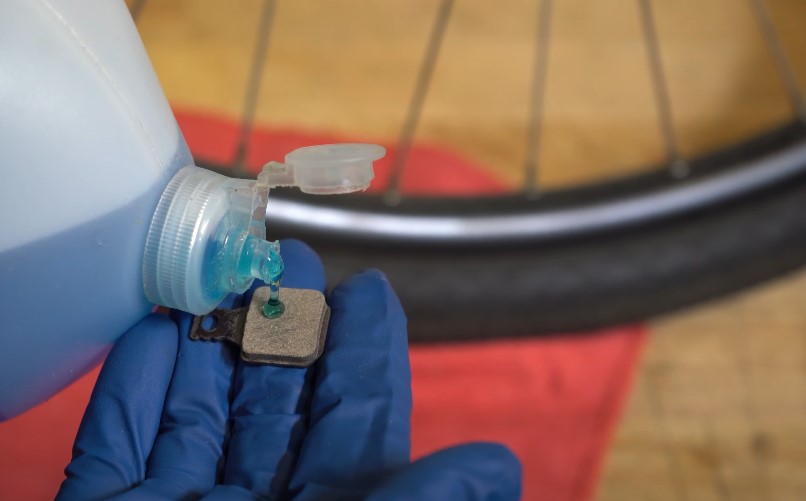
- Keep all oils and sprays far from pads and rotors.
Warning: If pads or rotors have been soaked in oil or show a rainbow sheen, replacement is usually the only cure. Both Shimano and SRAM highlight contamination as the number-one cause of persistent squeal.
2. Check Wear Levels
Brake parts have precise limits:
| Component | Minimum Thickness (Shimano) | Other Brands |
| Pads | 0.5 mm friction material | Same across most brands |
| Rotors | 1.5 mm | Magura often requires 1.8 mm |
If you’re near or below those limits, replace pads or rotors before adjusting anything else.
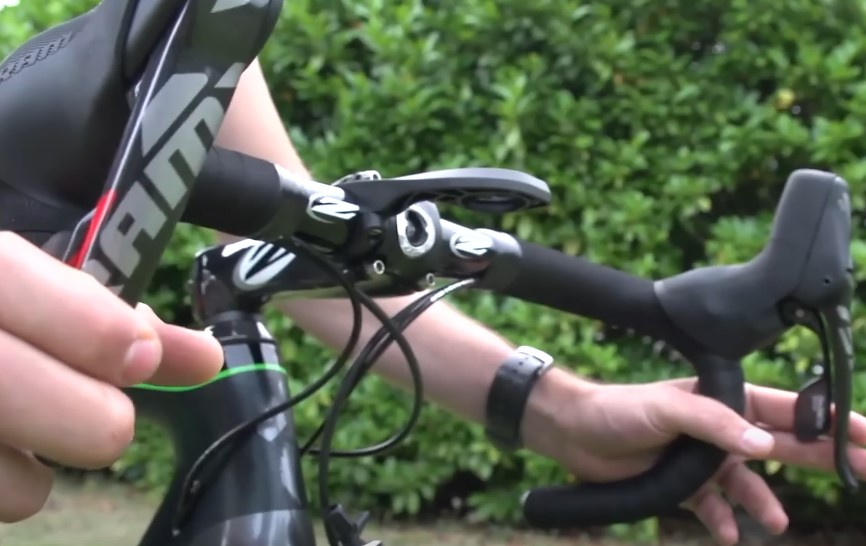
3. Align the Caliper
Even a tiny misalignment can cause squeal.
- Hydraulic calipers: Loosen the two mounting bolts. Hold the brake lever to center the caliper, then snug the bolts and fine-tune visually.
- Mechanical calipers: Adjust inner and outer pad clearance, then center the caliper before setting cable tension.
Note: Don’t rely on the barrel adjuster for big gaps – it’s for fine-tuning only.
4. True the Rotor
@adobomoto How to fix squeaky surron brakes! #surron #surronx #surronbrakes #ebikes #surronebike #electricbike
If the rotor grazes the pads once per revolution, gently bend it with a truing fork. Work in small adjustments and re-check often.
A bent rotor is a common source of pulsing and squeak.
5. Torque All Hardware
Loose bolts can vibrate like a tuning fork. Torque specs matter:
- 6-bolt rotor bolts: 6-8 N·m
- Center Lock lockring: 40-50 N·m, depending on the system
A torque wrench is your friend here.
6. Reset Pistons
If one piston retracts farther than the other, you may get uneven contact. Remove the pads, push pistons back evenly, reinstall pads, pump the lever, and then re-center the caliper.
7. Bed-In the Pads
Bedding-in creates a thin, even transfer layer on the rotor surface, improving bite and usually eliminating squeal. Steps (common to Shimano and SRAM):
- Find a safe, flat area.
- Accelerate to moderate speed, then brake firmly down to walking pace.
- Repeat 10-20 times, one brake at a time.
- Don’t stop and hold the brake clamped while hot – it can imprint uneven material.
If you skipped this when parts were new, doing it now can completely transform braking feel.
8. Pick the Right Pad Compound
Pad material affects both noise and performance:
- Resin/organic pads: quieter, smoother, but wear faster.
- Sintered/metallic pads: better in wet grit and high heat, but often noisier.
Choose based on your riding conditions.
9. Wet-Weather Noises
Sometimes a little squeal in the rain is unavoidable. SRAM points out that water and grit lower friction temporarily. A few strong stops usually dry things out.
Fixing Rim Brake Noise
Rim brakes operate differently but share the same core issue – vibration. Here’s how to quiet them down.
1. Clean Pads and Rims
- Wipe rims with isopropyl alcohol.
- Scrub away rubber buildup or oil.
- Lightly scuff glazed pads with fine sandpaper to restore bite.
2. Set Toe-In
Toe-in means the leading edge of the pad touches the rim slightly before the trailing edge. That preload damps vibration.
- Insert a thin card or rubber band at the trailing edge while tightening the pad bolt.
- Aim for about 1 mm difference front-to-back.
- Test and adjust until the howl is gone.
3. Center the Brake
Both pads should contact the rim evenly. If one hits before the other, re-center the caliper and tighten hardware to spec. Also, make sure the wheel is seated straight in the dropouts.
4. Manage Fork Shudder (Cantilever Brakes)
Older cyclocross or touring bikes with cantilever brakes sometimes suffer fork shudder – an amplified vibration.
Fixes include adjusting straddle cable geometry, adding a fork-crown cable hanger, or switching to a different brake design.
Troubleshooting Table
A Clear DIY Sequence
Disc brakes:
- Clean with isopropyl.
- Inspect the pad and rotor thickness.
- Align the caliper.
- True rotor if needed.
- Torque bolts correctly.
- Reset pistons.
- Bed-in pads.
- Swap pad compound if appropriate.
Rim brakes:
- Clean rims and pads.
- Center brake arms.
- Set toe-in.
- Check wheel seating and rim condition.
When to Visit a Shop
Sometimes the home toolkit is not enough. Head to a bike shop if:
- Brakes howl even after cleaning, alignment, and bed-in.
- Rotors or rims show cracks, grooves, or heat discoloration.
- Pads or rotors are below the thickness limits.
Professional mechanics have precision tools for stubborn cases.
Extra Tips to Keep Brakes Quiet
- Keep sprays and lubes far from braking surfaces.
- Re-bed brakes after any pad or rotor swap.
- Match pad compound to your riding style and conditions.
- Clean rims and rotors regularly, especially after wet or gritty rides.
Specs and Limits
- 6-bolt rotor bolts: 6-8 N·m
- Center Lock lockring: 40-50 N·m
- Pad thickness (Shimano): replace at 0.5 mm
- Rotor thickness (Shimano): minimum 1.5 mm
- Rotor thickness (Magura): minimum 1.8 mm
Wrapping Up
Brake squeal can feel like your bike is calling out for help. The good news is that most of the time, it’s a straightforward fix: clean, align, check wear, and bed-in.
Whether you’re running modern hydraulic discs or classic rim brakes, the steps above will quiet things down and restore confidence in your ride.
Quiet brakes aren’t just about peace of mind; they’re about making sure your bike stops as smoothly and safely as possible.